CTC Admin User Guide
NEW KNOWLEDGE BASEThe document below covers the legacy version of CTC Admin. For help articles about the new version (released August 31, 2022), go to the CTC Admin Knowledge Base.
Introduction
This guide is intended to assist users (such as developers, operations personnel, and support personnel) that need to manage, monitor, and troubleshoot devices using CalAmp’s device-management platform, CTC Admin.
This is CalAmp’s next-generation device-management platform that succeeds PULS. The new platform has many powerful and innovative features and is built on a high-performance architecture. It is designed to be consistent and user-friendly.
The new CTC device-management platform enables automatic provisioning and authentication of your devices, remote configuration and management, monitoring and diagnostics, analytical dashboards, and efficient bulk firmware or software updates and maintenance.
For security and compliance, CTC has two different instances, US and EU, with these URLs:
CTC Admin dramatically simplifies device management and will significantly improve operational efficiencies related to device provisioning and configuration, support and troubleshooting, and general organization of devices and customers. CTC will cut down device-provisioning efforts, decrease revenue loss due to delayed device updates, reduce troubleshooting efforts, and increase revenue with advanced security and regulatory compliance.
Scope
This guide gives a detailed overview of how to use the new device-management features and functionality using the user interface (UI).
Step-by-step procedures are provided that describe how to perform the following functions:
- Remotely manage CalAmp device groups, firmware updates, and configuration changes
- Monitor devices' operational status and microservices
- View device firmware updates and configuration change history
- View or modify device configuration
- View or add device files to your account
- Set up subaccounts
- Set up and organize device groups
- Manage users and user permissions for devices and accounts
Setting Up Your Account
CTC accounts are automatically set up by CalAmp when a subscription is purchased in conjunction with edge devices, or when devices are migrated from PULS to the new device-management platform. Accounts are created in the instance of the customer's choice (US or EU).
After the account is created, the administrator contact you provided in the purchase order process will receive a welcome email with the necessary URLs, application keys, and credentials that will enable them to access the CTC Admin UI, APIs, and the CalAmp developer portal.

Sample Email
Logging in to the CTC Device-Management Platform via the UI
You can log in to the web interface as follows:
- In a browser, navigate to the URL for your account region:

The login screen
- Type the username and password provided in your welcome email.
- Click Sign In.
On your first login, you will be prompted to change your password.
Logging in via the API Interface
Refer to the section The API Login Interface to learn how to log in to CTC using APIs.
Using Global Search
After successfully logging in, you will be brought to the new platform's UI. The modules highlighted in the screenshot below will help you use different features available for your devices, assets, users, accounts, and groups.

Sidebar menu
At the top right of the CTC screen is a Global Search field that enables you to search a variety of areas in CTC.
Type in your search request and press Enter.
This will open the Search Results window, which will show the matching results in the categories Accounts, Users, Assets by Name, Assets by VIN, Devices, and Groups by Name.

Global Search
Managing Your Users
The new platform provides self-service user management, with role-based access to give users different levels of privileges to manage accounts, devices, groups, files, and such.
Adding Additional Users to Your Account
If you have Admin credentials, you can add more users and assign roles based on the application they need to access. All users created using the new UI will receive credentials to log in via email.

The Users screen
The following table has information on roles for the CTC Admin application:
Role Name | Description | Target User | Module Access | Device File Permission | Device Permissions | User Permissions |
|---|---|---|---|---|---|---|
Customer Admin | Customer Super Admin role | Super Admin in the customer's organization | Access to all modules | Create, Read, Update, and Delete for customer files (PEG script, PEG2 script, and so on) | Read and Update | Create, Read, Update, and Delete |
CTC Admin - All Features | Admin role without provisioning (remote device update) permissions | Customer Admin who doesn't need to perform provisioning work | Access to all modules except provisioning | No file access | Read and Update | Create, Read, Update, and Delete |
Customer Developer | Upload device files such as PEG and PEG2 into account and update devices with firmware, script, and other files | Customer user who creates/uploads customer files such as PEG script and PEG2 script | Access to all modules | Create, Read, Update, and Delete for customer files (PEG script, PEG2 script, and so on) | Read and Update | Read |
Customer Provisioning | Update devices with firmware, script, and other files | Customer user who updates files on devices through jobs | Access to all modules | Read | Read and Update | Read |
Customer Support | Read-only needs | Customer support user in the customers' organization | Access to all modules | Read | Read | Read |
Creating Subaccounts
With the new CTC device-management platform, customer users have access to create subaccounts under their main accounts. This powerful feature enables you to manage select devices in your organization or in one of your customers' organizations in a separate account. Using hierarchical account management, you can limit device access to specific users.
When you create a user at a subaccount level, that user will be able to see and manage only devices in their subaccount (and the hierarchy beneath it, if any).

Account View
To create a subaccount, follow these steps:
- Go to Admin >> Accounts.
- Click Add at the top right.

- In the Add Accounts dialog box, provide the account name.
- To make the subaccount a different subscription, select Enterprise Account and enter the subscription level. (For example, choose DM Adv for device-management functionality.)
- Click Next.
- Select the CTC Admin (for UI access to users), DM Admin (for device management in account), and Connect API Docs applications.
- Click Next to add contact details or skip to the last section.
- Select your unit of measure and time zone.
- If necessary, select Enable Auto-Asset Creation and Enable Auto-Asset Association to have CTC automatically create an asset when an installed device detects a vehicle and automatically associate it with that vehicle in the software.
- Click Confirm to create the account.
After the subaccount is created, you can navigate to it using the steps in the following subsection, "Switching Accounts," and create users under that account with the required roles.
Switching Accounts
You can switch to a different subaccount as follows:
- In the sidebar menu on the left, click the up/down arrows icon to the right of the name of the account you are logged in to.

The Account Switcher will appear.
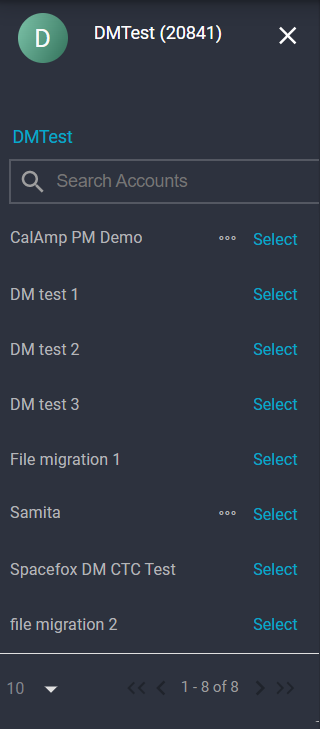
- Click Select to the right of the subaccount name you want to switch to.
- Click X at the top right of the Account Switcher to exit it.
NOTE: If you are in a subaccount, you will need to click the main account name before switching to another subaccount.

Using Interactive Dashboards
CTC Admin provides an analytical Dashboard you can access by clicking Dashboard in the sidebar menu on the left. The Dashboard enables you to view the breakdown of devices in your account and subaccounts based on device model, firmware version, and configuration version. In addition, you can see how many devices haven't been reporting to the system in the last 7, 14, 30, or 90 days.

Dashboards
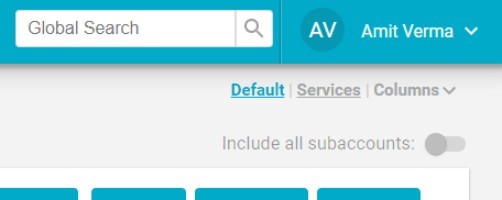
All the charts are interactive. If you click a section of a pie chart, the results for just its model or version will be displayed in the table below. You can export the data to a .csv file using the CSV icon to the top right of the grid.
NOTE: To view the data of subaccount devices as well, select the Include All Subaccounts toggle at the top right of the screen.
Searching for Devices
The Devices module, which you access by clicking Devices in the left sidebar menu, shows a list of all the devices in your account. This module can be used to view device details and perform actions such as creating groups and jobs (which is how you perform over-the-air updates).
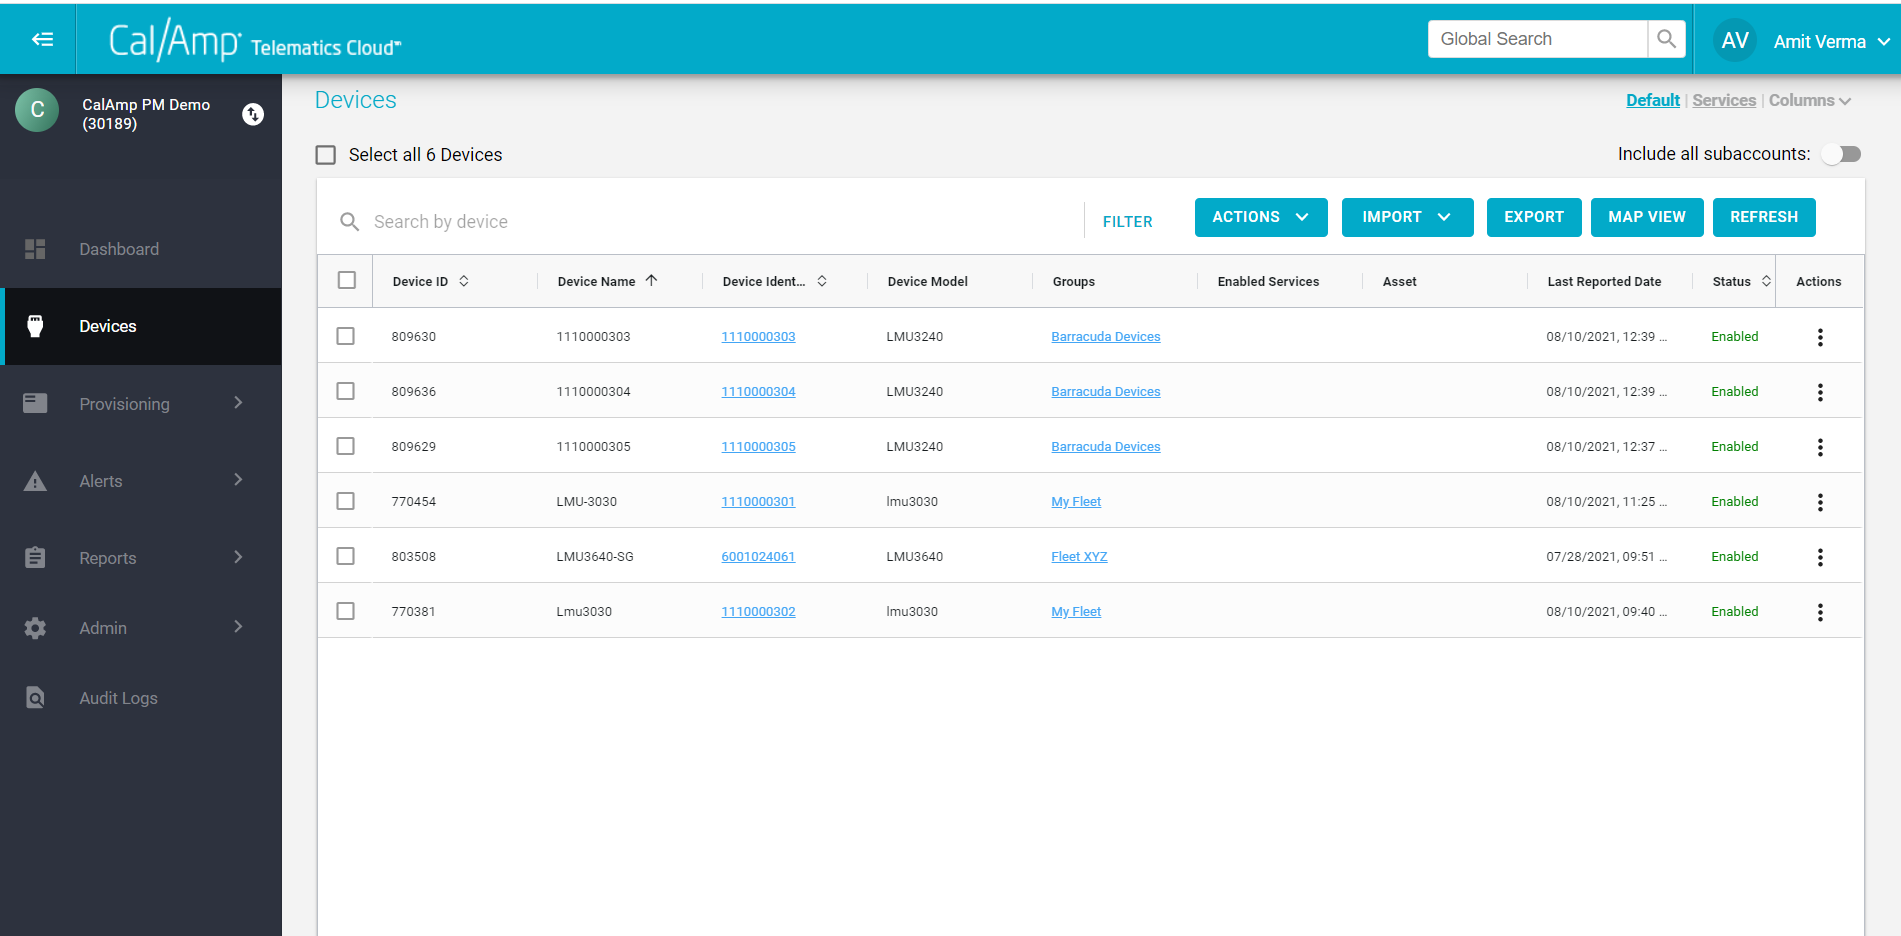
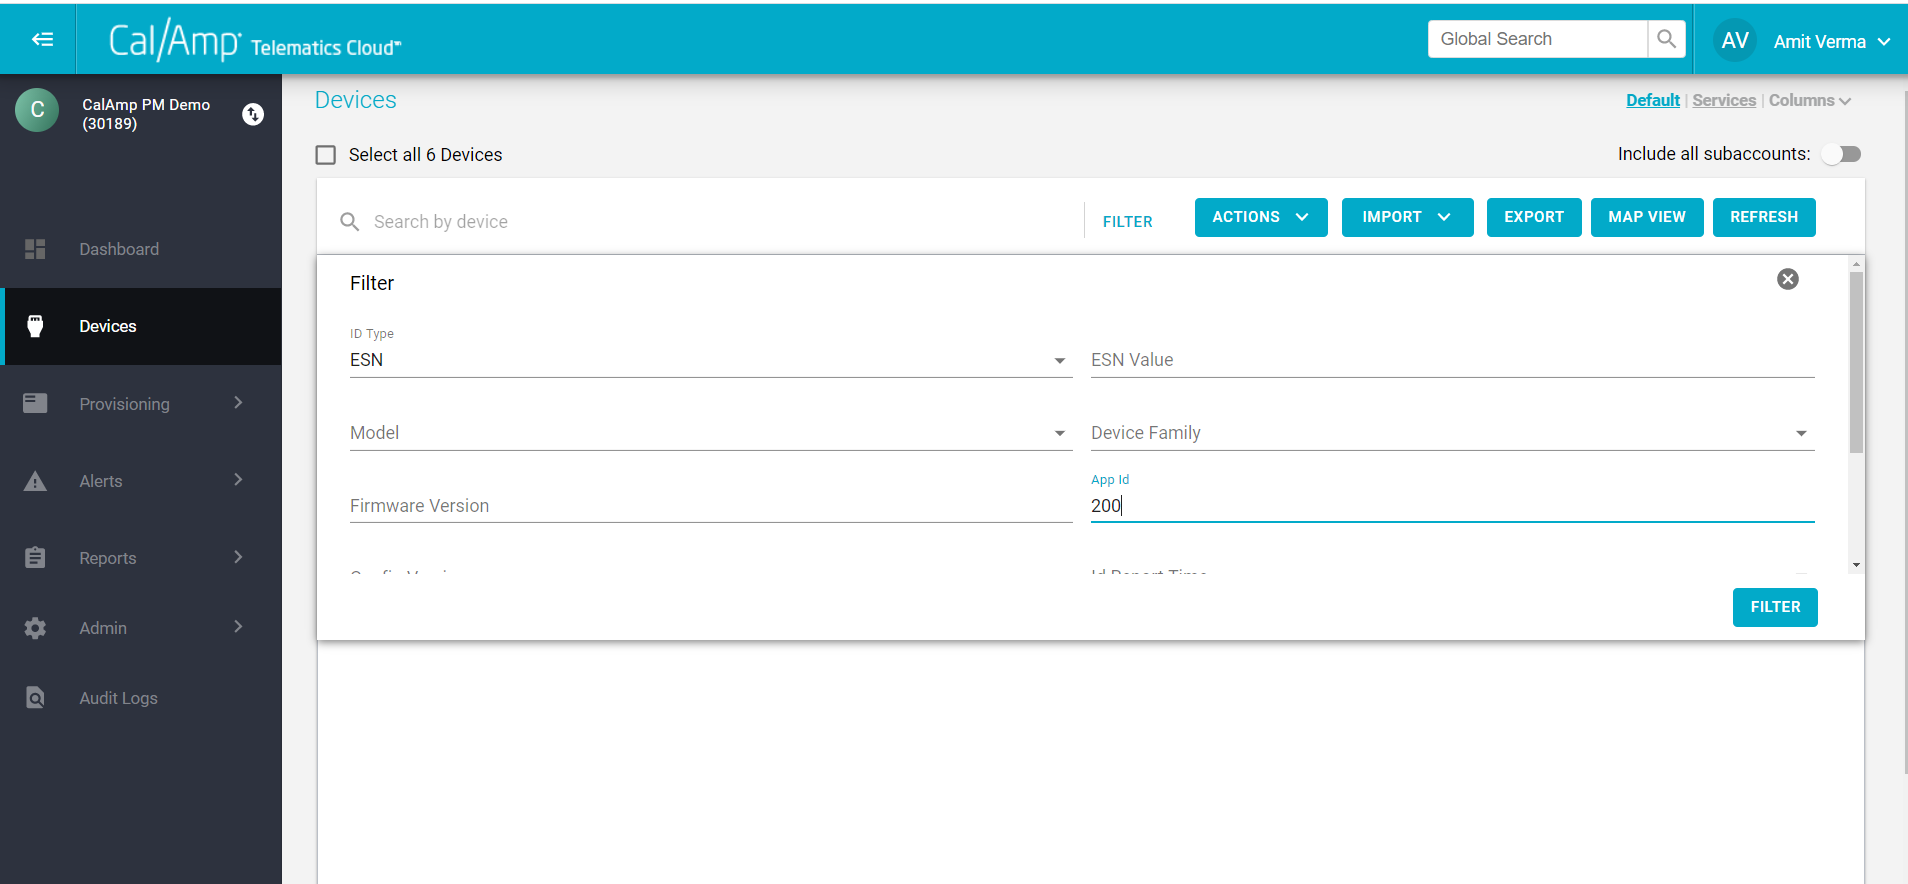
The new platform uses smart search, which means that you search using partial keywords. You can also copy and paste a large number of ESNs or other device identifiers in the search bar. To limit the devices that appear in the grid, you can filter by device model, firmware version, configuration version, group, app ID, and so on.
Searching for a Device Using an APITo search for a device using an API, go to Devices Search.
The default view displays only certain columns in the Devices table. You can change your view via the options at the top right (Default or Services view), and you can configure the columns that are shown by clicking the Columns drop-down arrow. This will open a dialog box that enables you to choose the columns you want to see.
Include All Subaccounts ToggleThe Devices screen automatically shows the devices of the account you are logged in to. To display devices in subaccounts, select the Include All Subaccounts toggle.
Viewing the Details of a Device
To view an individual device's details, click its numeric ID link in the Device Identifier column. The details will look something like this:

Device Details
At the top of the device details screen, you can find the following information:
- Device Identifier (ESN)
- Firmware Version
- Asset Name
- Device Model
- Config
- Last ID Report
- Status
- App ID
- Last AVL Report
Alternatively, you can click the overflow icon (three vertical dots) in the Actions column of the device's row and select View to pull up the details in a pop-up window.

Device Details
The Device Detail Tab
The Device Detail tab displays general information about the device, such as its account, device configuration, and group. The Additional Information section (click Show More) shows the IMEI, the IMSI, the ESN, and other data.
The Files Tab
The Files tab has information about the current firmware and configuration files on the device. Also, you can select Log to view files that were historically assigned to it. You can limit the displayed files using the Device Type and File Type drop-down lists.
The Services Tab
The Services tab shows the services that have been enabled for the device, such as CrashBoxx, iOn Vision, and various sensors, plus the level of the services' support (such as Operational or Supported).
The ID Report Tab
The ID Report tab displays ID report data, including OTA capabilities, file table, device services, and extensions.
The Events Tab
On the Events tab, you can see all the events generated by the device, such as AvlEvents and DtcEvents. You can search for events that occurred on a particular date and for specific types of events. You can export the results to a CSV file by clicking the Export button.
NOTE: This section is applicable only if your organization uses CalAmp Telematics Cloud's DataPump subscription.
The Alert History Tab
You can view all the alert notifications that resulted from the alerts set on your devices in the Alerts module on the Alert History tab.
The MFG Data Tab
You can view any available manufacturing data for the device, such as part numbers, on the MFG Data tab.
The Shipping/Warranty Tab
The Shipping/Warranty tab displays shipping information, including shipping date and carrier, and warranty details (if any).
The Actions Menu
You can click the Actions drop-down arrow to access a menu with these options:
- Edit: To modify the detail fields for the device. (Note that not all the fields can be changed.)
- Create Job: To update files such as firmware and PEG script for the device.
- Move: To move a device to a different account. To do so, select the new account in step 2 of the wizard. Devices can be moved only in the accounts belonging to the same hierarchy. To move devices to accounts in a different hierarchy, contact the CalAmp Support team at [email protected].
- View Audit Log: To view system-related logs for the device.
You can view a device's details via an API as shown here.
Creating Groups of Devices
You can create groups to manage devices, and each device can belong to multiple groups. There are two ways to create groups, as follows:
On the Devices Screen
To add a group from the Devices screen, follow these steps:
- Click Devices in the left sidebar menu.

- Select the check boxes of the devices you want to add to the new group.
- Click the Actions drop-down arrow above the grid.
- Select Bulk Edit Group.

- Leave the Add to Group radio button selected.
- If you want to place the group in a different account, click the Select Account drop-down arrow and choose the new account.
- Click the Select Group drop-down arrow and select Add New Group.
Two new fields will appear, Group Name and Notes.

- Type the new group name in the Group Name field, and optionally, any comments you have about it in the Notes field.
- Click Add.
"Add to New Group XX" will be displayed in the Action List area. - Click Submit.
On the Admin >> Groups Screen
You also can create a group using the Admin module, as follows:
- Click Admin in the left sidebar menu to expand its selections.
- Click Groups on its submenu.

- Click Add at the top right.

- In the Group Name field, type the name of the new group.
- Type any needed comments in the Notes field.
- Click the Add drop-down arrow and select either Assets or Devices (depending on which you want to include in the group at this point).
- Select the assets or devices to add to the group and then click Select.
- Click Save.
CalAmp is still working to bring groups API documentation on to this developer portal. Refer to our legacy developer portal and look for "Groups" under "Entity Services." (If you are directed to the CTC Admin home page, click the drop-down arrow to the right of your username and select Developer to access the legacy developer portal.)
Managing Groups and Devices
You can change group assignments of devices in bulk, including initially assigning them, disassociating them, or reassigning them as follows:
- On the Devices screen, select the check boxes of the devices.
- Click the Actions drop-down arrow above the grid.
- Select Bulk Edit Group.

Bulk Edit Group
- Select the Add to Group, Remove from Group, or Replace Group radio button, depending on what action you need to take.
- If you are replacing the group assignment, select the From Group and To Group using their drop-down lists and then click Replace.
- If you are adding a group assignment, click the Select Group drop-down arrow, choose the group you want to place the devices in, and then click Add.
- If you are removing a group assignment, click the Select Group drop-down arrow, choose the group you want to remove the devices from, and then click Remove.
The changes you are making will be displayed in the Action List area. - If the group modifications look accurate, click Submit.
Updating Devices Over the Air Using the Jobs Feature
All the device file updates in the new platform are achieved through a job. A job can have multiple tasks (files), and you can add more after the job has initially been created.
To add a job, follow these steps:
- On the Devices screen, select the devices the job will apply to.
You can do so by clicking the check box in each device's row or by taking advantage of the smart search technology, developed by Elasticsearch. This entails copying and pasting a list of device identifiers, separated by spaces, in the Search bar. (You can use device identifiers such as ESN and IMEI.)
You also can find devices by applying filters such as device model, firmware version, configuration version, ID type, device family, and app ID. After you have applied the filter, you can click Select All X Devices at the top left of the screen to choose all the results.

Elasticsearch
- Click the Actions drop-down arrow above the grid.
- Select Create Job.

- Type a name for the job in the Job Name field.
- Optionally, you can type a short description in the Description field.
- Click the Device Type, File Type, and File Name drop-down arrows and make the needed selections for each task in the job.
- Set the priority order by clicking the up or down arrow at the far right of each task's row (up to move it higher in the priority list, down to move it down).
NOTE: You can delete a task by clicking the minus button in its row. - You can add new task rows by clicking +Add Task.
- When the job is ready to submit for the selected devices, click Create Job.
Updating Devices Over the Air/Create a Job Using an APITo create a job using an API, refer to Create Job.
Managing Jobs
You can manage your jobs on the Provisioning module's Jobs screen, including checking the overall status of a job and individual device status for each of its tasks and canceling a job or one of its tasks.
Note:Successfully completed tasks (file updates) on a device cannot be undone by cancellation.

Check Job Status
Checking an Individual Job's Status
To see the overall status of a job, follow these steps:
- Go to Provisioning >> Jobs.
- Find the row of the job. You can search by job name or ID, if needed, or by filtering by its status or the date it was created.
- Check the value in the Progress Status column. Here is what the results indicate:
- Pending: The job was submitted recently but hasn’t been processed by the system.
- In Progress: The job is in the middle of being processed.
- Completed: The system has processed the job and successfully finished the tasks.
- Failed: The system has processed the job but failed to perform its tasks.
- Canceled: The job was canceled by a user.
NOTE: You can export the results of the Jobs screen to a CSV file by clicking the Export button.
Viewing the Details of a Job
To view the details of an individual job, follow these steps:
- Go to Provisioning >> Jobs.
- Find the row of the job. You can search by job name or ID, if needed, or by filtering by its status or the date it was created.
- In the row of the job, click the link in the Job Name column.
A pop-up window will open to display the job's details, including all its tasks (files) and the status of each file on your devices.

Job Details
- You can download the job details by clicking Download at the bottom right.
- Continue to the following subsection to view a task's details or cancel a task.
- Click Close if you are finished with the Job Details window.
Viewing a Task's Details and Canceling a Task
To view the details of an individual task and/or cancel it, follow these steps:
- In the Job Details window, find the row of the task.
- In the task's row, click the link in the Devices Count column.
A window will open that shows the status of each file on the devices.

Task Detail
- To cancel a task, click the minus sign in the Actions column.
A warning dialog box will appear. - Click Yes.
The status of the task will change to Canceling.
WARNING: This will cancel the task for all the selected devices. You can cancel the task for just some devices by clicking the Actions minus sign in each device's row. - Click Close when you are done reviewing the task's details.
Canceling a Job
To cancel an entire job, follow these steps:
- Go to Provisioning >> Jobs.
- Find the row of the job. You can search by job name or ID, if needed, or by filtering by its status or the date it was created.
- In the row of the job, click the link in the Job Name column to open its details window.
- Click Cancel Job at the bottom right.
NOTE: The button will be grayed out if you cannot cancel the job, such as when its status is Failed or Completed. Also, files that already have been updated on the devices will not be undone by canceling a job or task.
Managing Device Files
You can manage device files on the Provisioning module's Device Files screen, including adding files to an account, viewing files, and deleting them.
Adding Files to an Account
To add files such as a PEG or PEG2 script and geofences to an account, follow these steps:
- Go to Provisioning >> Device Files.

- Click Add at the top right.

Adding a File
- Select the device type and file type from the Device Type and File Type drop-down lists.
- You can drag and drop the required file or browse for it using the Browse for File option.
- Under Metadata, type the file version in the Version field.
NOTE: You will need to manually add the script version when you are uploading a script. - Type a description of the file in the Description field.
- Select the accounts that can use the file by clicking one of these radio buttons:
- Only This Account: The file will be available for only devices in the account you are logged in to.
- All Subaccounts: The file will be available for devices in the account you are logged in to and its subaccounts.
- Choose Subaccounts: This will add a field in which you will need to either type the subaccount names the file should be available for or select them from the drop-down list.
- Click Add File.
NOTE:After you add the file, the system will validate it and update its File Status value on the Device Files screen. If the status is returned as Invalid, click the Actions overflow button (three vertical dots) and select Edit to view the errors. Make the required changes in the file, upload the updated file, and click Add File.
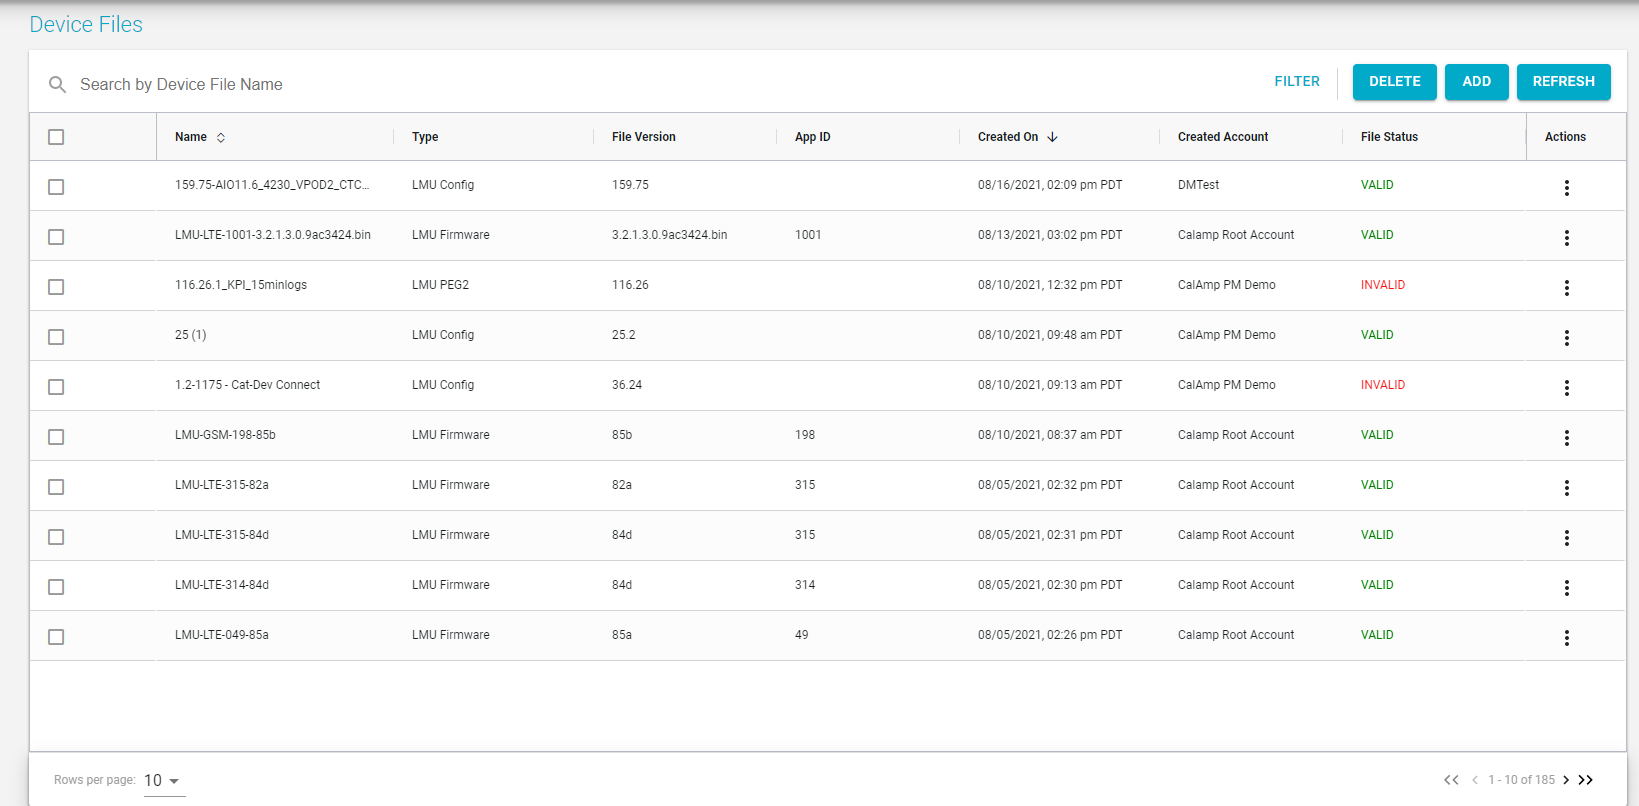
Viewing and Deleting Files
To view and delete files, follow these steps:
- Go to Provisioning >> Device Files.
- Find the row of the file. You can search by filename, if needed, or by applying a filter (such as its device type, file type, status, or the date it was created).
- In the row of the file, click the Actions overflow button (three vertical dots) and select View to see its details or Delete to remove the file from the account.
NOTE: You may or may not have permissions to delete the file, depending on your user privileges.
Manage Your Files Using APIsSee these to manage your files using APIs: Current Device File, Device File History, Update File, and File.
Managing Alerts
You can use the Alerts module to create alerts and check notifications for existing alerts. When you click the Alerts drop-down arrow in the left sidebar menu, you will be presented with these submenu options:
- Alerts Setup: Enables you to add alerts by choosing from the provided alert types. You choose an alert's destination, such as SMS, email, URL POST, and mobile PUSH. Alerts can be updated or deleted as well.
- Notifications: You can view the notifications received from alerts here.
You can view your notifications as follows:
- Go to Alerts >> Notifications.

- You can scroll down the list to view all the alert notifications, search by alert type to find certain ones, or apply a filter (by severity level, ESN, asset name, or time frame) to limit the results.
To add a new alert, follow these steps:
- Go to Alerts >> Alerts Setup.

- Click Add at the top right of the screen.

- Type the name to use for the alert in the Name field.
- Type an explanation of what the notification is designed to inform the user about in the Description field.
- If you want the alert to be triggered by assets in subaccounts of the account you are logged in to, select Process for Subaccounts.
- Click the Alert Type drop-down arrow and select the alert type you want to use.
- Click the Severity drop-down arrow and select the priority level of the alert: Low, Medium, High, or Critical.
- Leave the Status field at its default value of Enable.
- Optionally, in the Snooze Duration field, type a snooze value (in seconds) for how long you would like the system to wait before sending another notification triggered from this alert.
- If the alert type requires trigger values, enter those (or update their default values, if needed).
- Choose how you want the notification to be delivered — by text (SMS), email, URL POST, and/or push notification — and enter the contact, template, and/or platform information on the corresponding tabs.
- Click Save.
Running a Report
CTC Admin's reports can provide you with all kinds of information about your devices, jobs, and accounts. You can run reports manually or schedule them to run on a specific timeline.
What Reports Should I Begin With?
Here are descriptions of three reports you will find useful:
- Advanced Device Details: Provides advanced details about your devices, including mobile ID and ESN, account, app ID, part number, ICC-ID, firmware status, current firmware version, date of the last firmware update, configuration status, configuration version, date of the last configuration update, VBUS status, and GPS antenna status, plus modem, radio, and GPS data. You will find that this is similar to the PULS CSV report.
- Devices Basic: Provides basic details about your devices, including mobile ID and ESN, account, app ID, part number, firmware status, and current firmware version.
- Device File Updates: Provides a list of devices that have been updated over the course of the selected time range by mobile ID and ESN, including the status of the firmware update, firmware version, configuration status, configuration version, account, and app ID.
Running a Report
To run a report, follow these steps:
- Click Reports in the left sidebar menu.

- In the row of the report you want to run, click the overflow icon (three vertical dots) at the far right (in the Actions column).
- Select Run.
- Select the options you need, such as account, part number, app ID, firmware version, configuration version, and time frame to return results for.
NOTE: There are limits to the number of results that can be returned. Currently, real-time reports can't have more than 5,000 records; however, scheduled reports can have up to 100,000 records. - Click Apply.
The results will appear in the right pane.

Scheduling a Report
To schedule a report, follow these steps:
- Click the Reports drop-down arrow in the left sidebar menu to expand its menu.
- Select Scheduled.
Your scheduled reports, if any, will appear.

- Click Add at the top right of the screen.

- Click the Select Report drop-down arrow and choose the name of the report you want to schedule.
- In the Name field, type the name want to appear on the Scheduled Reports screen, such as "Advanced Device Details, every Monday."
- Select PDF or CSV as the output format.
- Select the frequency of the report (such as Weekly and then Mon) and the duration.
NOTE: If you don't provide an end date, the report will run indefinitely. - You also can specify the time of day for the report to run.
- Click the Time Zone drop-down arrow and select your time zone.
- Type the recipients in the Email Report To field, separating multiple email addresses with a comma.
- In the Email Message field, type the body of your email, perhaps providing a short description of the scheduled report.
- Select whether to send the report as a link or attachment.
- Click Save.
Administering Your Account
If you have Admin privileges, you can administer your account using the Admin module, including changing your accounts, assets, system, users, and groups. You can view account and subaccount details on the Admin >> Accounts screen. On the Admin >> Assets page, you can see all your assets' details, add new assets, and delete assets.
Adding an Asset
You can add a new asset as follows:
- Go to Admin >> Assets.

- Click Add in the top-right corner.

Adding an Asset
- Type the name, description, and other details on the first page of the Add Asset window, General Information.
- Make sure to specify the asset type using the Asset Type drop-down list.
- Click Next to proceed to the Additional Information page.
- Fill in as many fields as needed, based on use case.
- Click Next to continue to the Associations page.

- If applicable, click the plus sign to select devices or assets to be associated with your new asset, select the devices or assets, and then click Select.
- Click Next to continue to the Confirmation page.
NOTE: If the asset doesn't need any associations, click Skip. - Click Confirm to create the new asset.
Adding Assets in Bulk
To add multiple assets at once, follow these steps:
- On the Admin >> Assets screen, click the Actions drop-down arrow and select Import.

Adding an Asset in Bulk
The Import Assets dialog box will appear.

Upload Assets
- Click Download Blank Template (if you are importing new assets entirely) or Download Template with Assets (if you are editing properties of current assets; you can also add new assets with the same file).
- In the Excel file that is downloaded, fill in the required fields (which are indicated by a red background), plus any of the other data you'd like to include, placing each asset's properties horizontally across (in a row) and save it.
- Add the Excel file to the Import Assets dialog box by using the Browse for File option or dragging and dropping it where indicated.
- Optionally, you can use the Select Group drop-down list to associate the assets to a group.
NOTE: The assets will be added to the account you are logged in to. - Click Import.
Searching or Filtering for Assets
You can search for an asset on the Admin >> Assets screen by typing its name in the Search by Asset Name field at the top left and pressing Enter.
You can apply a filter to search for assets as follows:
- On the Admin >> Assets page, click Filter to the right of the Search field.
- You can filter by VIN, license number, vehicle type, asset type, and group, plus status (Enabled, Disabled, or Suspended).

Filter
- After choosing your filter criteria, click Filter.
Deleting Assets
To delete one or more assets, follow these steps:
- On the Admin >> Assets screen, click the check box in the row of each asset you want to delete.
- Click Delete at the top right of the Assets grid.
- In the warning dialog box that appears, click Submit.
Exporting Asset Details
You can export the details of your assets to an Excel file as follows:
- On the Admin >> Assets screen, click Export above the Assets grid.

Asset Export
The Bulk Export Assets dialog box will appear.

- Click Export.
The Excel file will be downloaded.
Managing Your System
On the Admin >> System screen, you can create device configurations, PEG behaviors, PEG labels, and AEMP configurations.
NOTE: This is applicable only if your organization uses CalAmp Telematics Cloud's DataPump subscription.
Adding a User
You can add new users, update the privileges of existing ones, or delete users on the Admin >> Users screen.
To add a user, follow these steps:
- Click Admin >> Users.

- Click Add above the grid.

Add User
- Type the user's first and last names, the username they will use to access the new platform, and their email address on the first page of the Add User window, General Information.
- Type the password they will use when they first log in in the Password and Confirm Password fields.
- Select Notify User to send the new user a notice when they are added.
- Click Next to proceed to the Applications page.
- Select CTC Admin for the application they will need to access and their role for it. (See "Managing Your Users" earlier in this document for guidance on roles.)
You can click + at the far right to add a new row for additional applications.

- Click Next to continue to the Contact Information page.
- Click Add, enter the user's contact information, and then click Next.
NOTE: If you don't need to include contact details, click Skip. - On the Settings page, you can specify a unit of measure and an end date for the user's access.
- Click Confirm to add the new user.
They will receive an email with login details if you chose Notify User.
Creating a Custom Role
If you find that the built-in roles described earlier in "Managing Your Users" aren't sufficient for your organization's needs, you can create a custom role as follows:
- Click Admin >> Users.
- Click the Roles tab.

- Click Add above the grid.
- Type a name and description for the new role.
- Select CTC Admin from the Application drop-down list.

Add Role
- Select the check box for each feature/screen the new role will need to have access rights to.
- Click Save.
Managing Your Groups
On the Admin >> Groups screen, you can create new groups, view your current groups, and see their details.
Auditing Logs
You can view system logs for accounts, assets, devices, groups, and users on the Audit Logs screen.
To audit your logs, follow these steps:
- Click Audit Logs in the left sidebar menu.

- Click the drop-down arrow to the right of "Device" and select the type of entity whose logs you want to see (accounts, assets, devices, groups, or users).
- Click Search.
The grid will be populated with a list of the entities, such as groups. - Find the row of the particular entity. You can search by entity name, if needed.
- In its row under Actions, click the view icon.
The Audit Logs for Entity Name window will appear.

- You can audit the changes that were made to entity, including when the modifications were performed, what fields were updated, and what user made the changes.
- You can click the eye icon in the Actions column for an edit to see its details.
NOTE: You can enter beginning and end dates at the top of the window and click Submit to view only changes that were made in a specific time frame. - Click Close to exit the window.